
Kirsty Dunn
Food Editor 2013
Articles by Kirsty Dunn
13 articles found. Displaying page 1 of 2.
-
Culture
 Issue 26 06/10/2013
Beetroot Chocolate Cake
This cake is gorgeous. It comes out a rich cocoa-burgundy colour, has a moist but light texture, and tastes great – it’s not too sweet. If, however, you want to up the ante on the sugar count, I’d ice the top (adding a little berry jam to regular icing makes a nice change and turns it a lovely pink colour), or you could always split the cake and fill it with jam and cream. And if anyone catches you with a face full of its deliciousness you can always be like, “well, it’s got beetroot in it and therefore counts as one of my five-plus a day requirements.” That, my friends, is what “winning at life” looks like. Enjoy! Ingredients:- ¼ cup desiccated coconut - 400g beetroot - 160g dark chocolate - 3 free range eggs - 400g caster sugar - 200ml cooking oil - 2 tsp vanilla essence - 2 tbsp berry or plum jam - 150g plain flour - 2 tbsp cocoa - 2 tsp baking powder - ½ tsp salt - Icing sugar Method:1. Preheat the oven to 180°C. Grease a round cake tin with a little butter and then sprinkle the coconut on the greased surfaces to make a thin coat. Shake out any excess coconut. 2. Cut the stalks and bottoms off the beetroot and boil for about half an hour until it becomes tender. Remove from the heat and leave for 15 minutes. Then finely grate the beetroot while it is still warm and set aside. 3. Break the chocolate up into squares, place in a bowl, and melt by sitting the bowl in hot water. In a separate bowl, whisk the eggs and sugar together. Then add the beetroot, melted chocolate, vanilla essence and oil, and mix. 4. Add the flour, baking powder and salt and stir to combine. Finally stir the jam through the mixture and pour into the tin. 5. Bake for approximately 45 minutes and then check how much more cooking time is needed by inserting a knife into the centre – if it comes out clean it is ready; if not, keep checking at ten-minute intervals until it does. If the top is getting a little cracked and dark, cover with tin foil to ensure it doesn’t burn or dry out too much. 6. When it is ready, leave it in the tin for 20 minutes or so before turning onto a cooling rack. Serve slightly warm with a dusting of icing sugar and some plain unsweetened yoghurt. Beet that! (I will not apologise for that. It had to be done.)
-
Culture
 Issue 25 29/09/2013
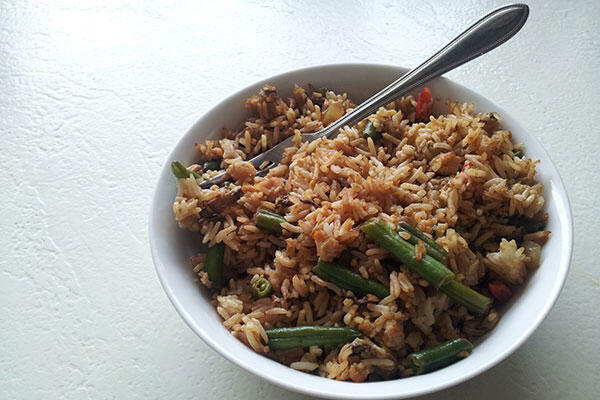
Fried Rice
Good old fried rice. Whilst it’s a simple takeaway staple, it can be surprisingly hard to adequately replicate at home. Therefore, I now impart to you my own tried and true recipe, inspired by my Mama’s version. It’s another great way to use up bits and pieces in the fridge and freezer – I often use frozen mixed veggies and whatever is in the fridge at the time (broccoli, cauliflower, courgettes etc.). You’ll need quite a large pan for this – if you haven’t already, I’d invest in a wok; they really are great for cooking large amounts for hungry flatties. If you want to spice it up a little more, add one deseeded, finely chopped chilli in with the garlic and onion, and a squeeze of lemon or lime juice just before serving. A cup of green tea and a few steamed dumplings are great accompaniments too. Ingredients (for four):- 2 cups of cooked basmati or jasmine rice - 3 cups of water - 3 free range eggs - 1/3 cup of milk - Salt and pepper - 1 medium sized onion, finely chopped - 2 spring onions, finely chopped - 1 cup sliced green beans - 1 cup sliced button mushrooms - ½ cup of diced red capsicum - 2 tbsp vegetable stock powder - Soy sauce - Chilli sauce (Sriracha is my pick) - Oil for cooking Method:1. Cook the rice. I find fried rice works best if you use cold cooked rice, so make it well in advance if you can. 2. Heat a tablespoon of oil in a large frying pan/ wok and brown the onion and garlic. 3. Add your vegetables (the frozen ones should go in a little earlier than the fresh) and stir-fry until they have just cooked through. Remove from the pan and set aside. 4. Combine the eggs and milk in a jug and add a little salt and pepper. 5. Heat a little oil in a flat pan (circling to coat the base) and pour in the egg. Flip when only a little liquid remains on top and the outside has cooked. When it is cooked through, remove from the pan and place on a clean chopping board. Dice into small pieces and add to the vegetables. 6. Heat a little more oil in the large pan/ wok and then add in the cooked rice, breaking it up as you go and turning it in from the side of the pan to ensure it all gets heated through. 7. Add the vegetable stock, 3 tablespoons of soy sauce and about a teaspoon of Sriracha, and stir through. 8. Add the vegetables and egg and stir through. Finally, add more soy and Sriracha to taste.
-
Culture
 Issue 24 22/09/2013
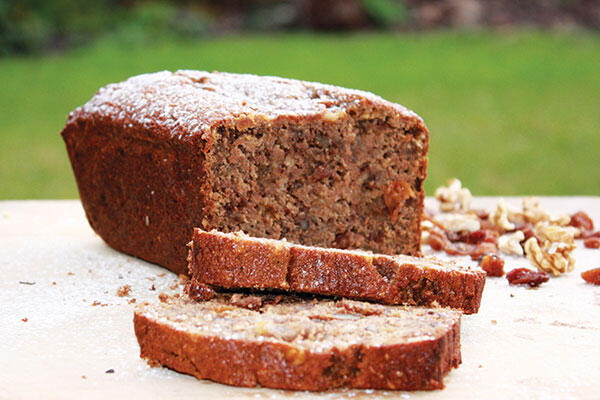
Fruit Bread
This recipe is really an anything-goes kinda deal; it’s a great way to make use of those icky brown bananas you’ve been avoiding, the ripening apples sitting alone in the fruit bowl, the dregs of forgotten dried fruit mixes in the pantry, and those various other bits and pieces you’ve got crammed at the back of the fridge. There are heaps of possible variations, too – use carrot in place of the banana and/or apple, fruit juice or honey to sweeten the mix instead of golden syrup, or replace the chopped nuts with rolled oats. If you’re really keen (read: in procrastination mode) you can make a couple of loaves at a time and freeze them. Slice them when they’re hot, though – that way you can take a couple of slices out as needed and reheat them in the toaster. Serve with a sprinkling of icing sugar and a smear of butter for maximum deliciousness. Ingredients: - 2-3 ripe bananas, mashed - 1-2 ripe apples, grated - 2 free range eggs - 120g butter - 1 cup sugar (brown or white or a mixture of both) - 1 tsp vanilla essence - 2 tbsp golden syrup - 1 tsp cinnamon - ½ cup chopped nuts (I used walnuts) - ½ cup fruit – chopped apricots or dates / sultanas, raisins etc. - 1 ½ cups flour (plain or wholemeal) - 1 tsp baking powder - 1 tsp baking soda Method: 1. Preheat the oven to 180°C. Line a loaf tin with baking paper, or grease it well with some butter or margarine. 2. Cream the softened butter and sugar together. 3. Add eggs one at a time, beating well after each addition. 4. Stir in the vanilla essence, golden syrup, and wet fruit ingredients. 5. Add the remaining dry ingredients, including the nuts and dried fruit, and mix well. 6. Pour the mixture into the loaf tin. Tap the bottom of the tin against the bench a couple of times to settle the mixture into the tin. 7. Bake for approximately one hour. The bread should be quite brown on top and a skewer or knife should come out clean when inserted into the centre. 8. Remove from the oven and leave the loaf in the tin for about 15 minutes before turning out onto a cooling rack. 9. Devour with a piping hot cup of English Breakfast.
-
Culture
 Issue 23 15/09/2013
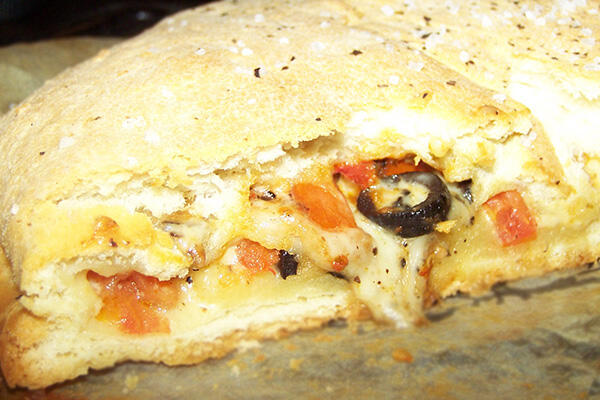
Stuffed Focaccia Bread
Dissatisfied with Pak ‘n’ Save’s colourless and inadequately topped pizza bread offerings? Unhappy with your regular, run-of-the-mill, unexciting toasted sandwich? Hankering after a more sophisticated savoury treat that you can customise? Then this delish stuffed focaccia recipe is for you, lovelies. I’ve included some basic ingredients for the filling, but anything goes, really – roasted peppers, sun-dried tomatoes, spinach, feta, capers, broccoli and blue cheese – basically whatever you’d put on a pizza. Don’t be put off by the bread aspect either; just allow enough a couple of hours to create your masterpiece so the dough has enough time to rise. Ingredients:For the dough: - 450g plain white flour - 300ml warm water - 2 tsp dried yeast - 4 tbsp olive oil For the filling: - 2 fresh tomatoes - 1 ½ cups of grated cheese or 250g of mozzarella - 1 cup of button mushrooms - 4 tbsp sliced black olives - 2tsp dried mixed herbs - Sea salt for sprinkling - Salt and pepper to taste Method:1. Sift the flour into a large bowl and then stir in the yeast. Make a well in the centre, pour in the oil and water, and then stir the ingredients together. 2. Transfer the mixture onto a floured surface and knead for about 10 minutes or so until you have created smooth and elastic dough. 3. Grease a bowl with a little olive oil, place the ball of dough inside and cover with a tea towel. Leave the dough to rise in a warm place for about 1½ hours until it has almost doubled in size. 4. In the meantime, prepare the filling ingredients. Dice the tomatoes and mushrooms and then place these, together with the cheese, olives, and mixed herbs, into a bowl. Lightly toss, and season with a little salt and pepper. 5. Once the dough has risen, briefly knead it one more time and then divide into two pieces. Place some baking paper on a baking tray and lightly brush with oil. 6. Roll out the first piece of dough to about the size of a dinner plate. Place this on the tray. Spread the mixture over the base, leaving 1cm around the edges. 7. Roll out the remaining dough (making it the same size as the first piece), brush the edges with a little water and place over the filling. Pinch the edges together tightly to seal. 8. Brush the top with a little olive oil. Sprinkle with the sea salt and bake in the middle of a preheated oven at 220º for 20-30 minutes or until the top has risen slightly, is firm, and golden brown in colour.
-
Culture
 Issue 22 08/09/2013
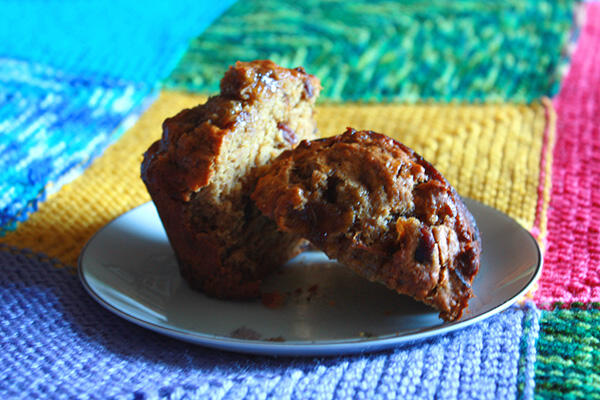
Sticky Date Muffins
I really don’t have much to say about these, except a) they are so freaking good, and b) you’d be a fool, A FOOL I TELL YOU, not to whip some up on a lazy Sunday and revel in their (and your) greatness. (Also you feel less like a fatty eating a muffin than scoffing down a bowl full of the pudding form, “a” being the operative word here.) Ingredients:- 200g pitted dates, chopped - 2/3 cup of soft brown sugar - 125g butter, chopped - 1 tsp baking soda - 2 cups flour - 1 ½ tsp baking powder - ½ teaspoon mixed spice - 2 free range eggs - 1 tsp vanilla essence For topping: - ¼ cup brown sugar - 1 tbsp butter - 2 tbsp milk Method:1. Preheat the oven to 190°C and grease the muffin tin (or you could use cases). 2. Put the chopped dates, sugar, first lot of butter and one cup of warm water in a saucepan and place on a medium heat. Stir until the butter has melted and the sugar has dissolved. Bring the mixture to the boil for a couple of minutes and then remove from the heat. Stir in the baking soda and then leave to cool for half an hour or so. 3. Whisk the eggs and vanilla together in a jug and set aside. 4. Sift the flour and the mixed spice into a bowl and make a well in the centre. 5. Pour the egg mixture into the well, followed by the cooled date mixture. 6. Fold in the wet ingredients gently until all of the ingredients are just combined. Take care not to over-mix, or they’ll turn out too dense – the batter should look a little lumpy. 7. Fill each muffin hole about three-quarters full with the mixture. Bake for twenty minutes, or until the muffins have risen, are golden brown in colour, and come away slightly from the sides of the tin. 8. For the topping, put the second lot of sugar, the butter and the milk into a saucepan and stir over medium heat until the sugar has dissolved and the mixture is smooth. 9. Brush the hot sauce over the tops of the muffins (be generous) as soon as you have taken them out of the oven and repeat until you have used up all of the sauce. Leave the muffins in the tin for 15 minutes or so, and then gently loosen them with a knife before lifting out onto a wire rack to cool slightly. These are best served warm with a cuppa.
-
Culture
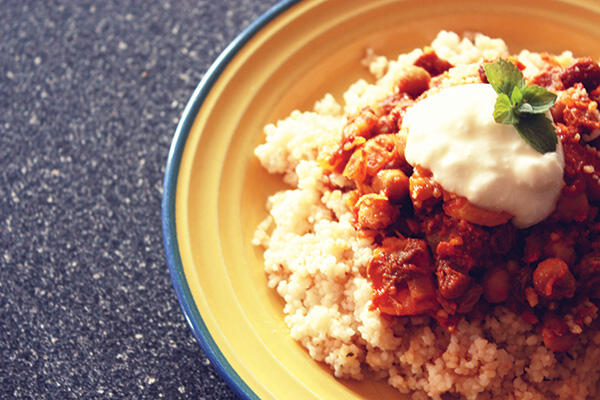 Issue 21 01/09/2013
Moroccan Stew & Minted Couscous
Couscous is the wonder-kid of the meal-accompaniment world. I mean, sure, rice is nice (until you have to clean the pot or dish you cooked it in), and pasta is fab (yet can be a little stodgy on the odd occasion), but couscous, on the other hand, is light and fluffy, easy to make, and super-duper versatile, and for that reason alone it shall forever occupy a prized position on my pantry shelf (next to the quinoa I like to think I use but don’t, and the brown rice I’ve recently relegated to go-to meal-base number two). The combination of chilli and cinnamon in this recipe packs a spicy punch, and when served with the minted couscous, yoghurt, and cashew nuts, it delivers on the flavour and texture fronts too. Serve with hummus for extra awesomeness. (And just in case you don’t love couscous as much as yours truly, the stew makes a great filling for wraps, pies, and samosas too.) Ingredients:2 tbsp olive oil 1 onion, finely chopped 3 cloves crushed garlic 1 tsp ground ginger 1 tsp ground turmeric 2 tsp ground cumin 2 tsp ground cinnamon ½ tsp dried chilli flakes 400g can tinned tomatoes 400g tin of chickpeas, rinsed ½ cup sultanas 400g pumpkin or kumara, cubed 2 carrots, diced 1 cup cashew nuts 2 cups of couscous 1 tbsp butter 1 vege oxo cube or 1 tbsp vege stock powder 4 tbsp chopped fresh mint Unsweetened yoghurt (optional) Hummus (optional) Method:1. Heat olive oil in a large saucepan. Add onion and cook for five minutes, until brown. 2. Add garlic, ginger, turmeric, cumin, cinnamon, chilli, and a couple of tablespoons of water and fry off for a minute or so. 3. Now add the tinned tomatoes, chickpeas, sultanas, and one cup of water. 4. Boil the mixture and then reduce the heat and simmer for about 20 minutes. 5. Add the pumpkin and/or kumara and the carrot and cook for a further half an hour, or until the pieces have softened. 6. Season with salt and pepper. 7. Pour 2 ½ cups of boiling water into a large bowl, add the vegetable stock, and stir. Pour in the couscous, add a dash of olive oil, cover, and leave for 10 minutes. 8. Add the butter and half of the fresh mint, and stir in as you fluff the couscous with a fork. 9. Serve the stew atop the couscous with some natural yoghurt flavoured with the remaining mint and/or some hummus on the side.
-
Culture
 Issue 20 18/08/2013
Mull It
Even though spring is almost upon us, I figure Dunedin still has a few chilly nights up its sleeve during which a bit of mulled action will go down a treat. If you haven’t had a go at making your own (or worse yet, if you’ve never even sampled the stuff – tsk tsk), now’s the time; have a farewell winter, hello mid-semester-break, shit-we’ll-have-to-start-doing-some-work-soon, cosy-onesie, pot-luck party and treat your bellies to some sweet and spicy mulled wine or cider. Mulled WineIngredients: - 10 cloves - 2 cinnamon sticks - 1⁄4 cup caster sugar - 1 orange - 1 teaspoon of freshly grated ginger, or 2 tsp of ground ginger (you can also use allspice as a substitute) - 1 cup water - 1 bottle of red wine (I used a cheap Merlot but you could also use a Cabernet Sauvignon) - 1⁄4 cup of brandy (optional) Method: 1. Peel the orange, cut into rounds, and set the peel aside. 2. Pour the wine into a large pot or crockpot and place on a low heat. 3. Add the rest of the ingredients and stir slowly. 4. Finely grate a teaspoon or so of the orange peel zest and add this to the mixture. 5. Turn the element to a medium heat, but take care not to boil it. Stir occasionally until all of the sugar has dissolved. 6. When the wine is steaming and the ingredients have been well blended it is ready to drink. Strain the wine into mugs or glasses and sip in the taste of winter and European Christmases. Enjoy! Mulled CiderIngredients: - 2 litres of apple cider - 6 cloves - 2 cinnamon sticks - 3 star anise - 1/3 cup brown sugar (you can also use honey as a substitute) - 1 orange - 1 lemon - 1⁄2 cup dark rum (optional) Method: 1. Peel the orange and lemon, set the peel aside, and squeeze the juice into a large pot or crockpot. 2. Pour in the cider and add the rest of the ingredients and place on a low heat. 3. Finely grate the zest of the orange and lemon peel into the mixture and stir. 4. Turn the element to a medium heat and stir occasionally until all of the sugar has dissolved. 5. Strain and serve into mugs. Marvel at how distinguished you feel. Enjoy!
-
Culture
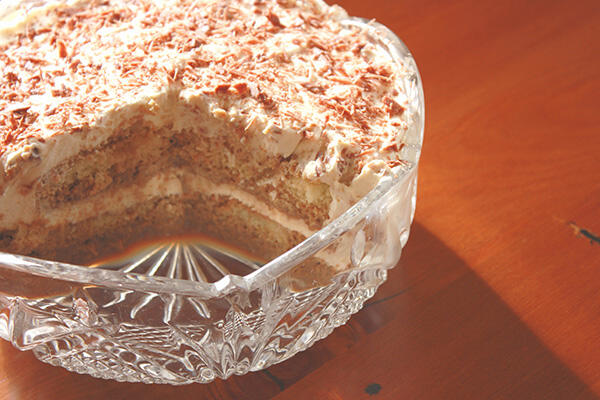 Issue 19 11/08/2013
Cheat’s Tiramisu
Tiramisu is Italian for “pick me up” – and after one mere spoonful of this delectable dessert it’s no wonder the creators dubbed it so. Tiramisu contains four of the most awesome ingredients known to humankind: coffee, chocolate, cheese, and alcohol. Boom! (Which, coincidentally, is the cry your arteries and/ or pant seams might make if you get a little too tirami-happy, if you know what I’m saying …) The thing is, delicious and divine as it may be, tiramisu can be a bit of a pain in the arse to make. Six egg yolks? Freshly brewed espresso shots? Marsala wine? Vanilla pods? Ah, no thanks. Like I’m leaving the house for/ spending my cash on/ wasting my time with those. Luckily for you (and everyone else you end up making this for), I’ve put together a less expensive and easier-to-make version that still retains the original flavour elements of the classic tiramisu. It’s not exactly authentic (hence, the “cheat” factor). But, from experience, authenticity is the last thing on people’s minds when they’re licking the bowl and elbowing others out of the way in order to secure themselves another helping. Those of you who are less budget-conscious can opt for the more “upmarket” ingredient suggestions in brackets (look at you, fancypants!). Ingredients:- 500mL cream - 250gm mascarpone cheese - 150mL Canterbury cream (or Kahlua, Baileys, Amaretto) - 5 tbsp caster sugar - 300mL strong coffee made with 4 tbsp instant coffee granules and 300mL boiling water - 2 unfilled sponges (or 2 packets of ladyfinger biscuits) - 2tsp cocoa powder - 1 bar of chocolate for decoration Method:1. Put the mascarpone, cream, sugar, and half of the liqueur into a large bowl. Beat until all the ingredients have combined and your mixture has the consistency of thickly whipped cream. 2. Have your serving dish ready; you are now going to layer the sponge with the cream mixture. Get a shallow dish and put your coffee mixture in it, along with the rest of the liqueur, and lightly mix. Dip in a piece of sponge for a couple of seconds, turn upside down and dip again, and then place into the serving dish. Do this until you have covered the bottom of the serving dish. 3. Now spread over half of the cream mixture. Repeat the sponge dipping process to create another layer on top of the cream and then spread the last of the cream mixture on top. 4. Decorate with sifted cocoa and grated chocolate. 5. Cover and chill for a few hours or overnight. This will last in the fridge for up to two days (yeah … right …).
-
Culture
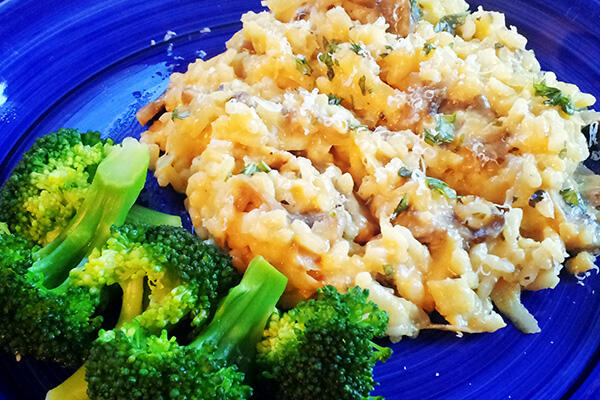 Issue 18 04/08/2013
Pumpkin Pesto Risotto
Tis the season for pumpkiny goodness. I picked up a fine, fresh looking specimen from the Dunedin Farmer’s Market last weekend for just $2 and managed to make this, a few servings of soup, and even had a little left over to go with the roast last night. Cooking with seasonal produce requires a bit of research and imagination, but you’ll save heaps if you can manage to put a few recipes together each week that make the most of what’s currently (and locally) growing. Substitute your green salads for a roast vegetable salad once in a while – root vegetables like parsnip, carrots, and beetroot are all reasonably priced this time of year. This risotto is another combination recipe, and what it lacks in appearance it makes up for with scrumptiousness. Pesto and pumpkin are a match made in culinary heaven. Ingredients:- 1 onion, finely diced - Olive oil - 2 cloves of crushed garlic - 2 tablespoons basil pesto - 3 tablespoons grated parmesan - Approximately 300g of pumpkin, grated - 200g mushrooms, sliced (optional) - ¼ cup white wine - 1 cup Arborio rice - 3 cups of hot water or vegetable stock* - Salt and black pepper to taste - Fresh basil Method:1. Fry the onion and garlic in a large saucepan or frying pan and cook for about three minutes until the onion has softened. Add the grated pumpkin and sliced mushrooms and heat through, stirring frequently. 2. Remove the vegetables from the heat, place them in another dish, and set aside. 3. Put a tablespoon of olive oil in the pan and place on a high heat. Add the rice and fry it off for a couple of minutes, and then add the vegetable mixture. Stir gently, add the white wine and one cup of the hot water or stock, and reduce the heat. Let the mixture simmer and stir every now and then until most of the liquid has been absorbed. 4. Add another cup of the liquid, stir occasionally, and again – let it simmer until the liquid has absorbed. Repeat this process until you have added all of the stock and continue to stir it frequently. Test the rice to see if it is cooked, and if not, add some hot water and repeat the process until the grains are tender (take care not to over-cook it, there’s a fine line between creamy risotto and sticky mush). 5. Once this rice is cooked, stir through the pesto and the parmesan. Season with salt and black pepper and serve with parmesan shavings, freshly chopped basil, and blanched broccoli. *If you’re ever boiling vegetables, it’s a good idea to keep the water you usually drain off. You can freeze this and use it as stock for soups, risottos, casseroles etc. #thanksma
-
Culture
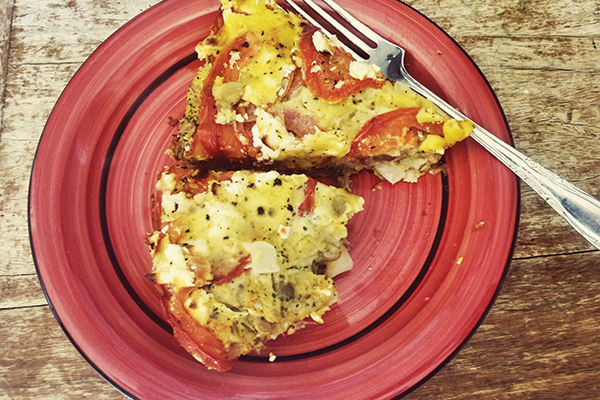 Issue 17 28/07/2013
Self-Crusting Tomato and Brown Lentil Quiche
Halt! Before you freak out at the presence of the “L” word and let memories of bland bygone quiches prompt you to move on to the next column, let me assure you that this is, hand on heart, the tastiest, most flavoursome quiche I’ve ever had; maybe even the best of all egg-based savoury dishes ever. For realz – its scrumptiousness has been attested to by the most blood-thirsty carnivores I know.* I have slightly adapted this recipe from one originally penned by Kiwi culinary legend, Alison Holst. Get your lentil on, lovelies! Ingredients:- 3/4 cup of brown lentils (soak for an hour or so beforehand) - 1 bay leaf - 2-3 cloves of garlic, crushed - 2 large onions, finely chopped - 1 lemon - 4 free range eggs - 1 cup milk - 1 teaspoon of salt - Freshly ground black pepper - 1 teaspoon of dried basil - 1/2 teaspoon of dried oregano - 1/2 cup of flour - 1/2 teaspoon of baking powder - 3/4 cup grated cheese - 2 tomatoes, sliced - Feta cheese for the topping - Oil Method:1. Soak the lentils in some water for about an hour if you haven’t already (I tried to warn you in the ingredients bit, guys. Keep up …) 2. Preheat the oven to 200° Celsius. 3. Lightly grease a quiche dish/pie plate. 4. Put the lentils in a medium sized saucepan, cover with water, and cook with the bay leaf for about 20 minutes or until they become tender. Drain and set aside. 5. Cook the onions and garlic in a separate pan with little bit of oil. When these have browned, remove them from heat and add the lemon juice and some cracked black pepper. 6. In a separate bowl, whisk the milk and eggs together; then add the basil, oregano, and salt and mix. 7. Add the grated cheese, flour, and baking powder to the egg mixture, taking care not to over-mix. 8. Add the lentils to the onions, then add this to the egg and cheese mixture. 9. Pour the mix into the dish and top with tomato slices. Crumble the feta cheese on top. 10. Bake for about 30 minutes or until the centre is firm. 11. Serve with seasonal vegetables or a green salad. *The words “bacon” and “tomato sauce” were not even mentioned. True story.
-
Culture
 Issue 16 21/07/2013
Whip It
Now that I have your attention, deviants, listen up: If Barry White’s voice could be distilled into dessert form, it would look, and taste, like this. This sumptuous chocolate mousse takes a mere twenty minutes to prepare, pleasures the palette in ways you never knew existed, and allows you to liven up your date night without the expense (and obviousness) of sucking back a few oysters as you recline on a satin chaise lounge. You can thank me later. Ingredients:- 250g block of dark chocolate (works best if you can find some with around 70 per cent cocoa solids – I used Whittaker’s Dark Ghana) - 300mL cream - 50g caster sugar - 2 free range egg whites (shopping ethically is hot) - 2 tbsp flavoured syrup or liqueur (optional) – e.g. Baileys (for the high rollers), Canterbury Cream (for the rest of us) Method:1. Measure out 100 grams of the chocolate, break into small pieces and set aside. 2. Place some cold water and a few blocks of ice in a large bowl and place a medium sized bowl inside it (keep the inside of this bowl dry – you will put your mixture in here to cool later). 3. In a small saucepan, heat half of the cream until it begins to boil and then turn off the heat. 4. Add the broken chocolate and stir until all of the chocolate has melted and the mixture is smooth. 5. Pour this mixture into the bowl surrounded by the iced water and add the rest of the cream and the liqueur or syrup. 6. Use an electric hand held mixer to whisk the chocolate mixture until peaks begin to form (you can do it manually – it just takes a little longer.) Remove the bowl from the iced water and set aside. 7. Now whisk the egg whites until peaks begin to form. Add the caster sugar a tablespoon at a time and continue to whisk into a soft meringue. 8. Fold the meringue mixture into the chocolate and then spoon into serving dishes (wine glasses are a nice touch). Leave these to set in the fridge. 9. If you want to go a little extra fancy, put some tin foil on a tray and then melt some of your remaining chocolate in the microwave or in a bowl set in some hot water. Add a tiny drop of cooking oil to make it slightly runnier and pour into a piping bag (a zip-lock works just as well). Cut a tiny snip off the end and use to pipe decorations onto your tray. 10. Once the mousse has set, decorate with your piped chocolate, grated chocolate, and some sliced almonds for added texture (or “sexture” even – apparently the zinc content in almonds enhances the libido. Rawr ...). 11. Get freaky (stay classy). Enjoy!
-
Culture
 Issue 15 14/07/2013
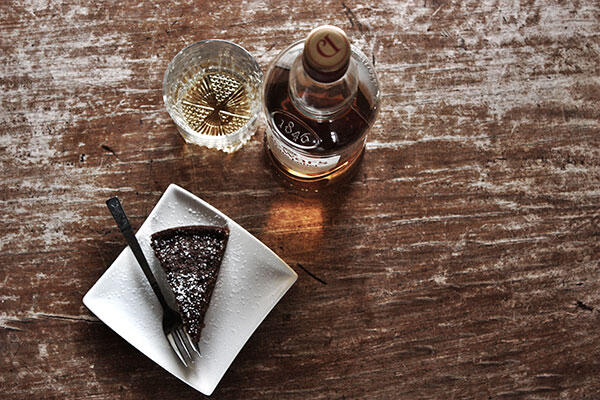
Winter Whisk(e)y Cake
Gie him strong drink until he wink, // That’s sinking in despair; An’ liquor guid to fire his bluid, // That’s prest wi’ grief and care: There let him bouse, an’ deep carouse, // Wi’ bumpers flowing o’er, Till he forgets his loves or debts, // An’ minds his griefs no more. (Robert Burns, 1785) I’m not suggesting you drown your sorrows in a bottle of hard liquor (as our beloved Scotsman so eloquently advocates), but I do, however, urge you to give this dark, rich, whiskey-infused cake a shot (pun intended). Seeing as it’s the anniversary of the poet’s death on 21 July, I thought it fitting to share. (Well, that and the fact that I found some of the fancy-schmancy amber elixir in my parents’ liquor cabinet recently.) Thistle warm the cockles o’ye heart. (Haha cockles). Ingredients- 225gm butter, softened - 1/2 cup brown sugar - 1/2 cup white sugar - 3 free range eggs - 1 cup plain flour, sifted - 1/2 teaspoon baking powder - 1/4 teaspoon salt - 1 teaspoon cinnamon - 1/4 teaspoon baking soda - 1/3 cup of cup milk - 1 teaspoon vanilla essence - 1/2 cup molasses - 1/4 cup whiskey (I used Dewar’s White Label) Method:1. Preheat your oven to 180 degrees. 2. Prepare your cake tin (I’d go with the round variety) – grease well or line with baking paper. 3. Cream the butter and both types of sugar together until you have a light and fluffy mixture. 4. Add eggs, one at a time, beating well after each addition. 5. Combine sifted flour, baking powder, salt, cinnamon and baking soda in another bowl. 6. Add the mixed dry ingredients to the creamed mixture alternately with milk, beginning and ending with dry ingredients. 7. Add molasses and mix, and then lastly add the whiskey. 8. Mix until smooth; your batter should be quite thin (if it doesn’t run off your mixing spoon very easily, then add a little milk until it is the right consistency). Pour into a greased round cake tin and bake 20 to 30 minutes, or until a knife inserted in the centre comes out clean. This cake doesn’t tend to rise very much, so don’t be disappointed if it comes out slightly flatter than your usual cake. 9. Dust with icing sugar. I think this is best eaten slightly warm (though if you’ve been having a sneaky dram while you cook it, I imagine you’ll already have a glow on). You could always make two, layer them and fill the middle with whipped cream – enhance the flavour by adding a couple of teaspoons of both icing sugar and whiskey to the cream before whipping.


